Improving the first visit on the learning platform
Testing the experience of real users. Finding problem areas. Designing a solution and implementing it. 2019
GOAL
Identify interaction difficulties during the first steps of inexperienced users on the platform
HYPOTHESIS
New users don't find how to set up payments and add students after payment, which worsens the onboarding success rate and reduces the number of sales, giving the impression of an inconvenient experience or no function to add students after payment. That is, users cannot find a feature that directly generates income for them. Without receiving income, the user will refuse to use the platform.
SCENARIO
The user has just registered on the Antitraining platform. He or she needs to create a training course, add some lessons, set up free registration of students, and auto-add students after paying for the course. The task is given 20 minutes.
USERS who took part in testing:
— Woman, 30 years old, wants to create an online school of marketing
— Man, 53 years old, wants to train his employees (corporate training)
— Man, 37 years old, wants to create woodworking courses
— Woman, 24 years old, an expert in the beauty industry who is ready to launch her course
— Woman, 32 years old, time management specialist, creator of information products
In the process of testing the first experience of interacting with the platform, many problems were identified: the impossibility to immediately create a course due to the lack of a course folder, the difficulty in uploading files to a lesson, the unclear addition of task types, etc. But the main problem that caused a wave of misunderstanding is the setting automatic addition of students.
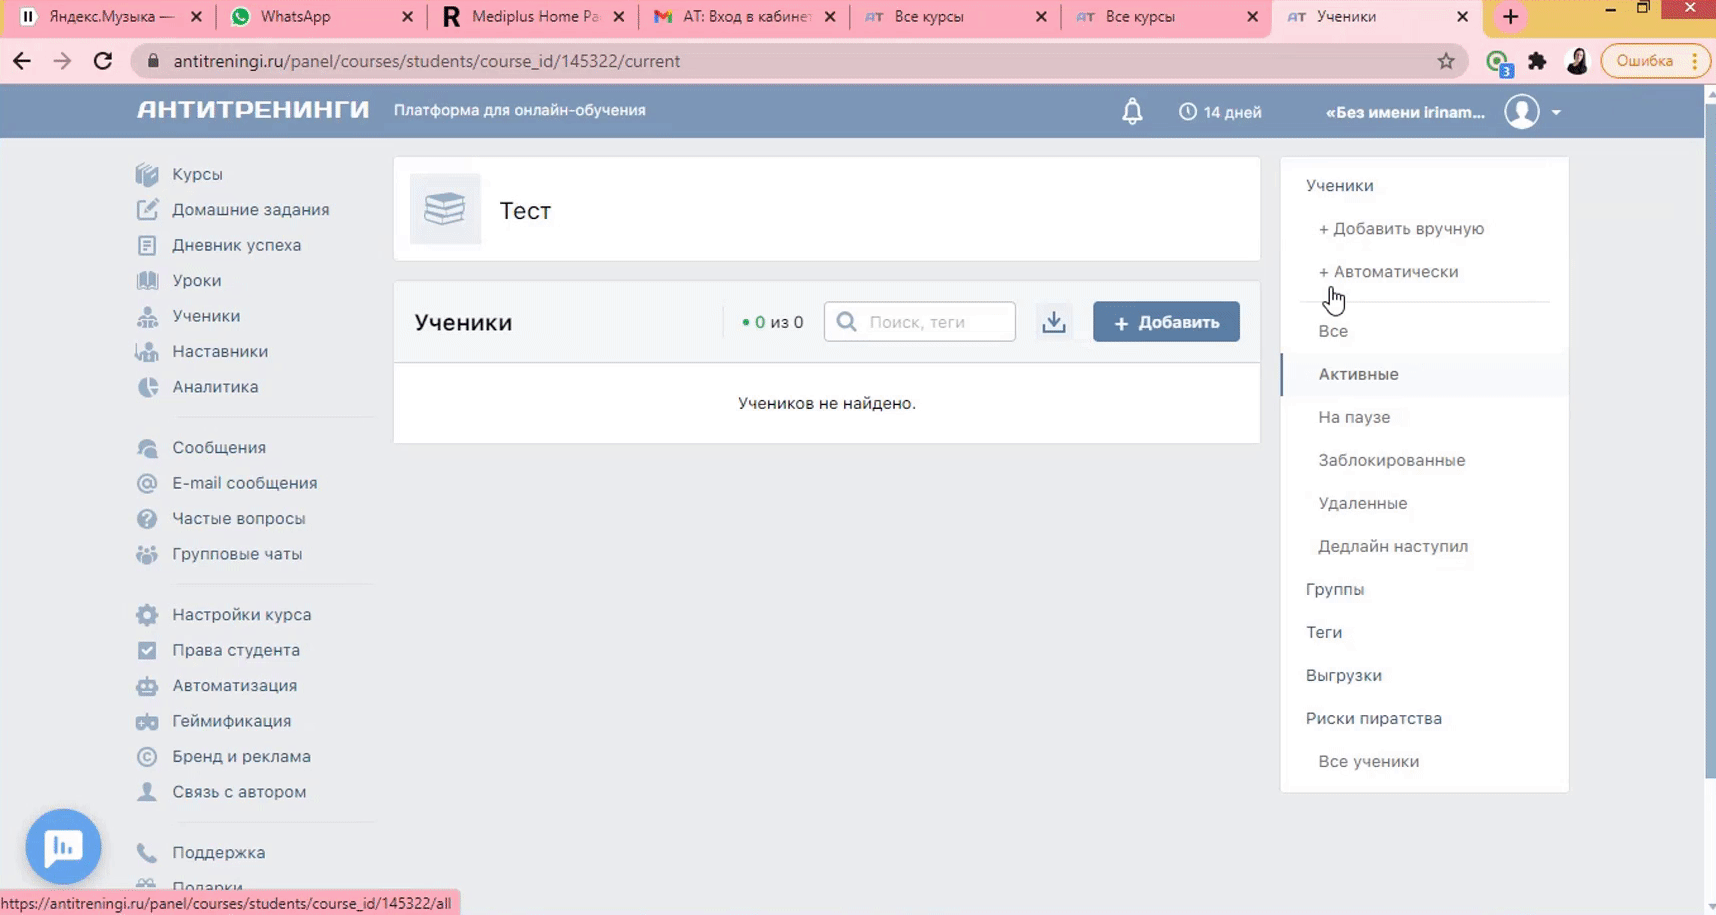

Main problem
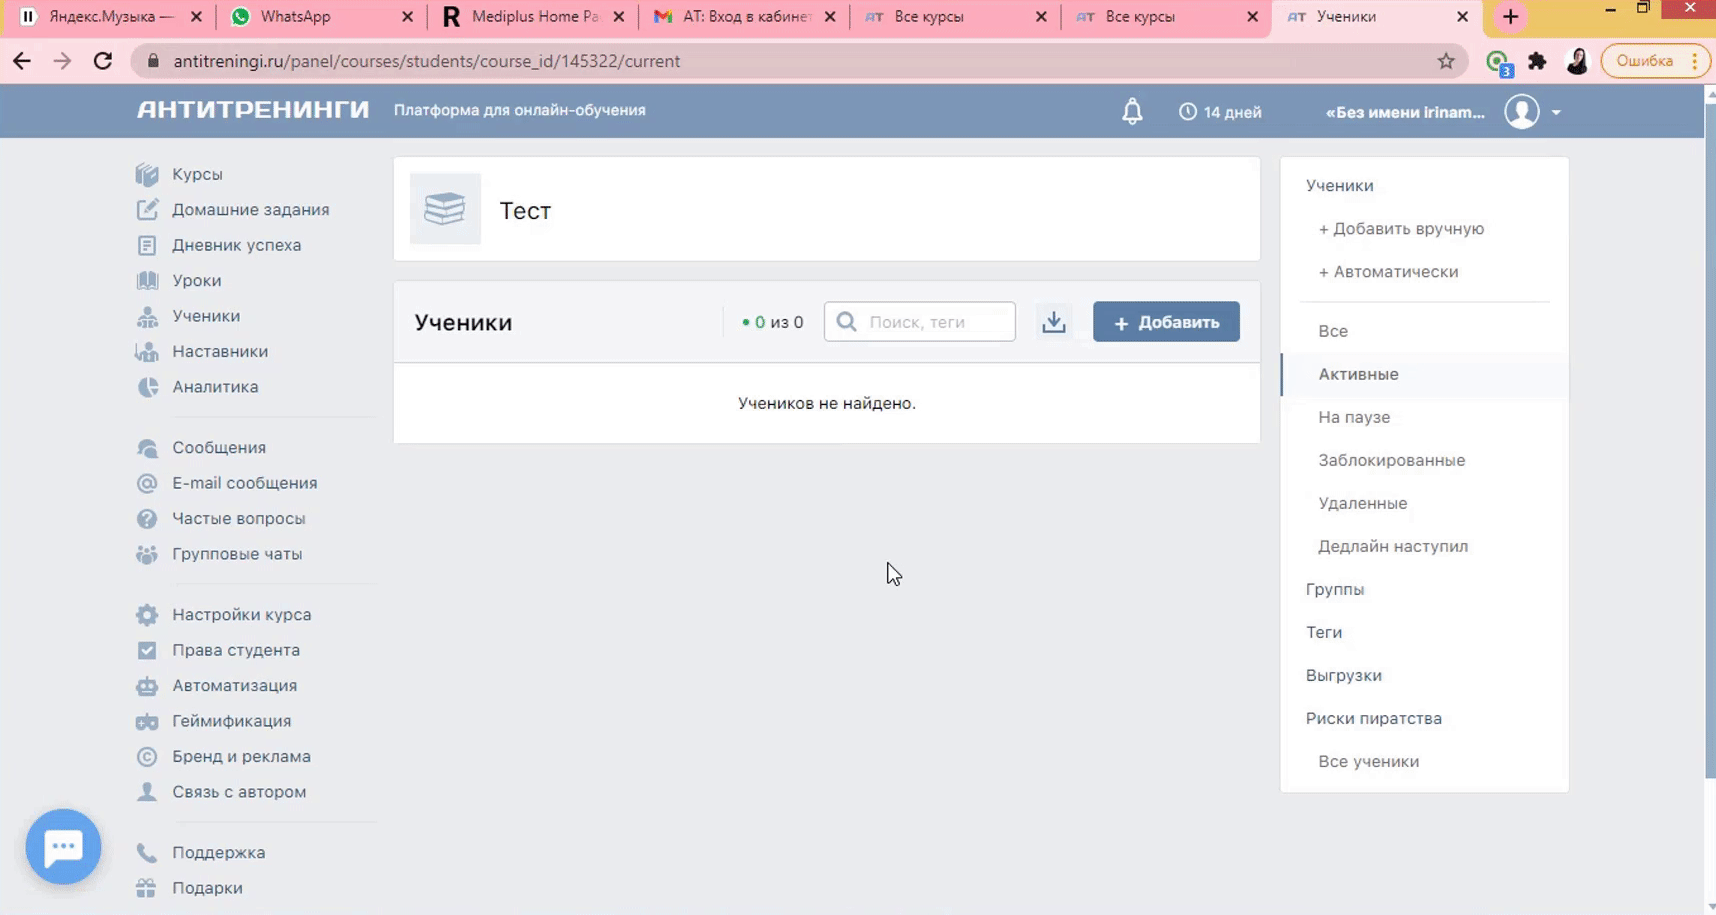
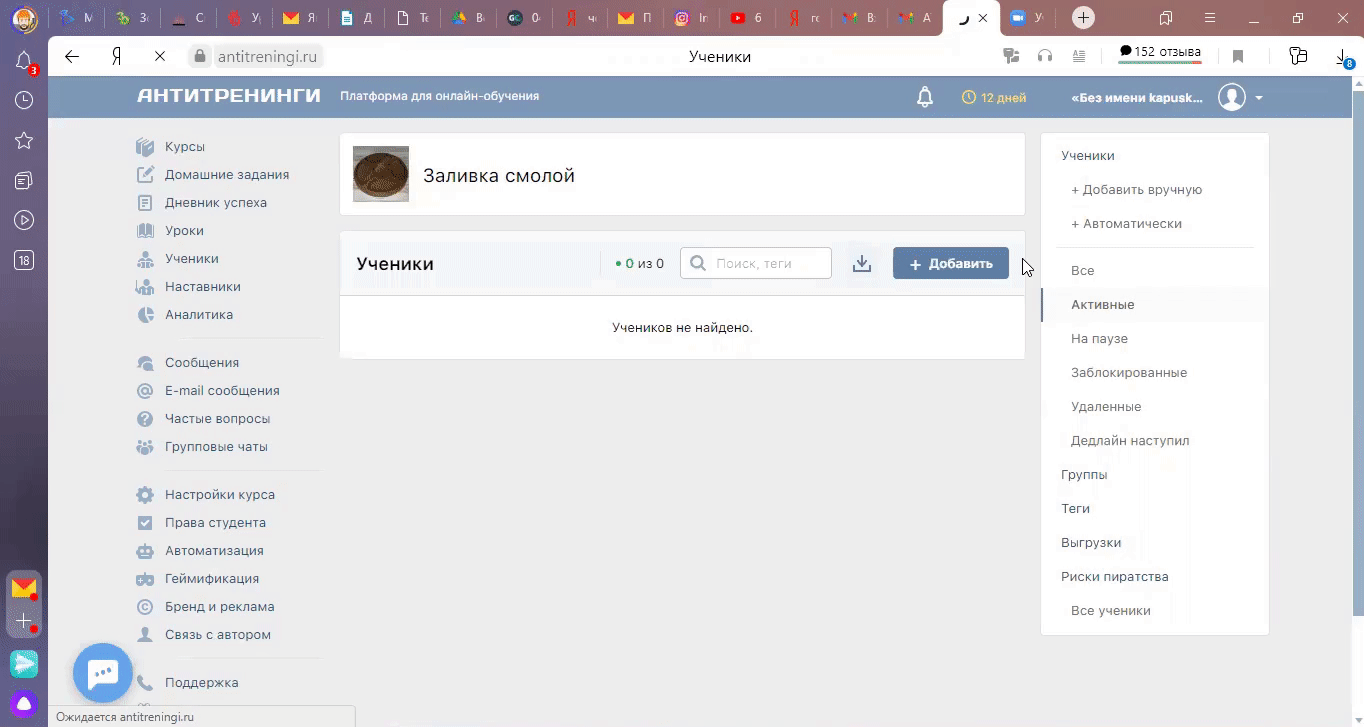
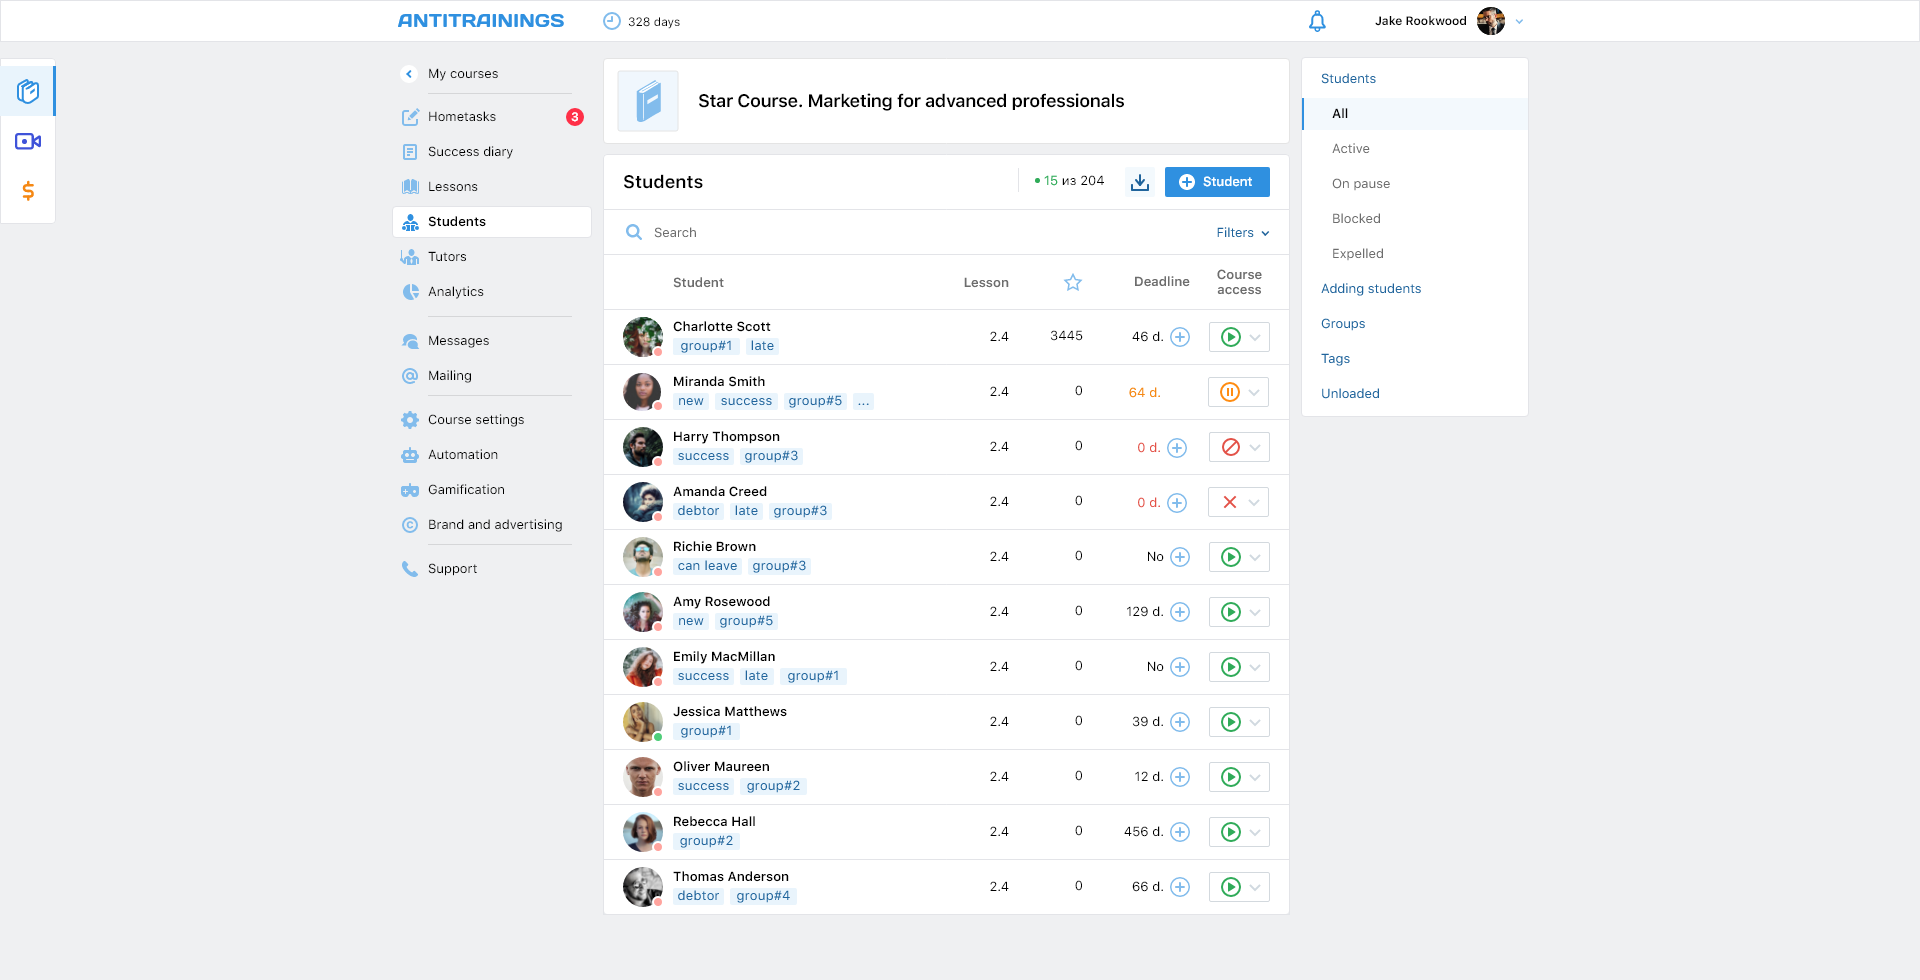
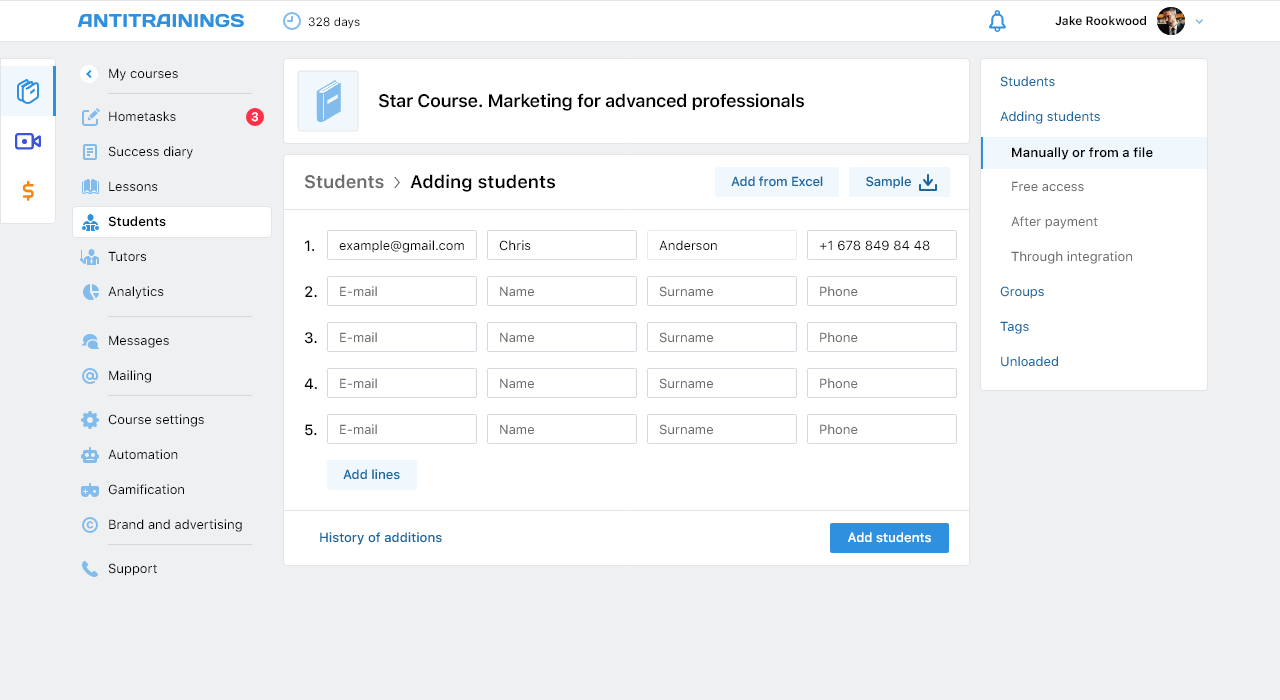
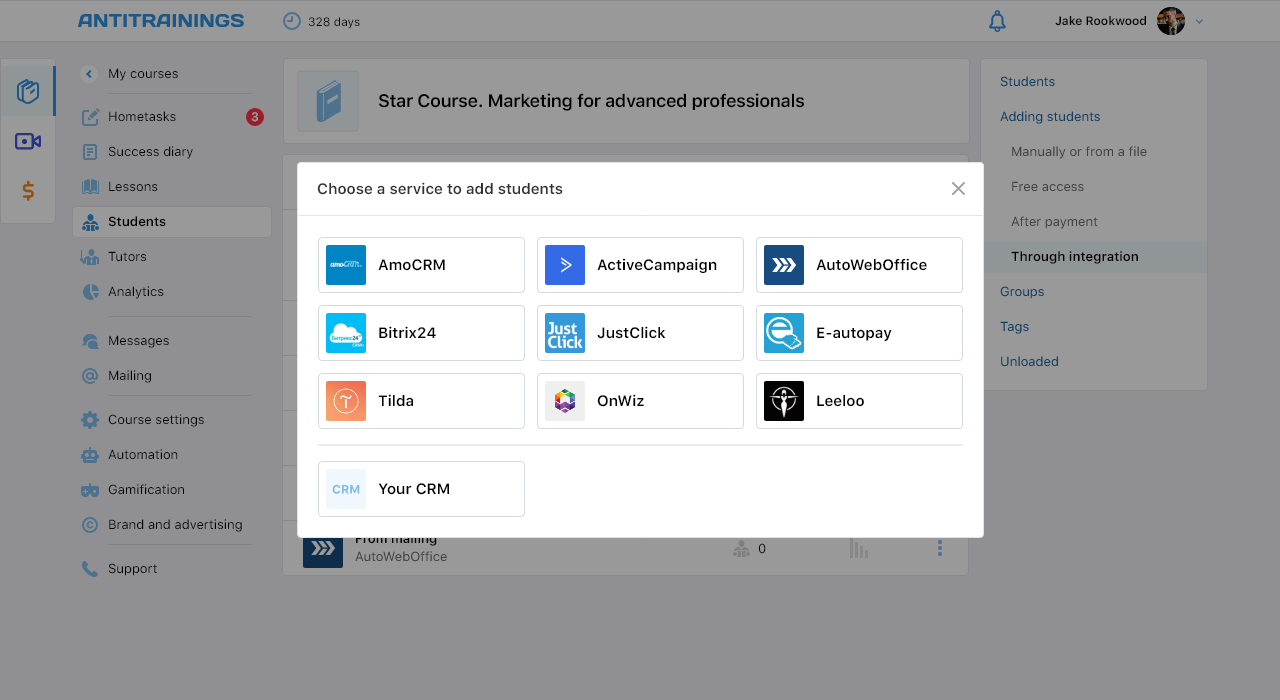
The authors don't understand how to automate adding students - how to create a free link, how to set up a simplified payment through our course payment service, or how to connect a full-fledged integration with another system that the author is used to using.
They're looking for the possibility of manually adding students, in different menus and other places. And even when they find the right section, they don't understand what to do, because it mixes all kinds of ways to add students.
It would seem that we have an advantage - our own course payment service, but the user doesn't understand how and what to configure it, and even how to ENTER it!
In this regard, it was decided to completely change the principle of adding students.
What did I change?
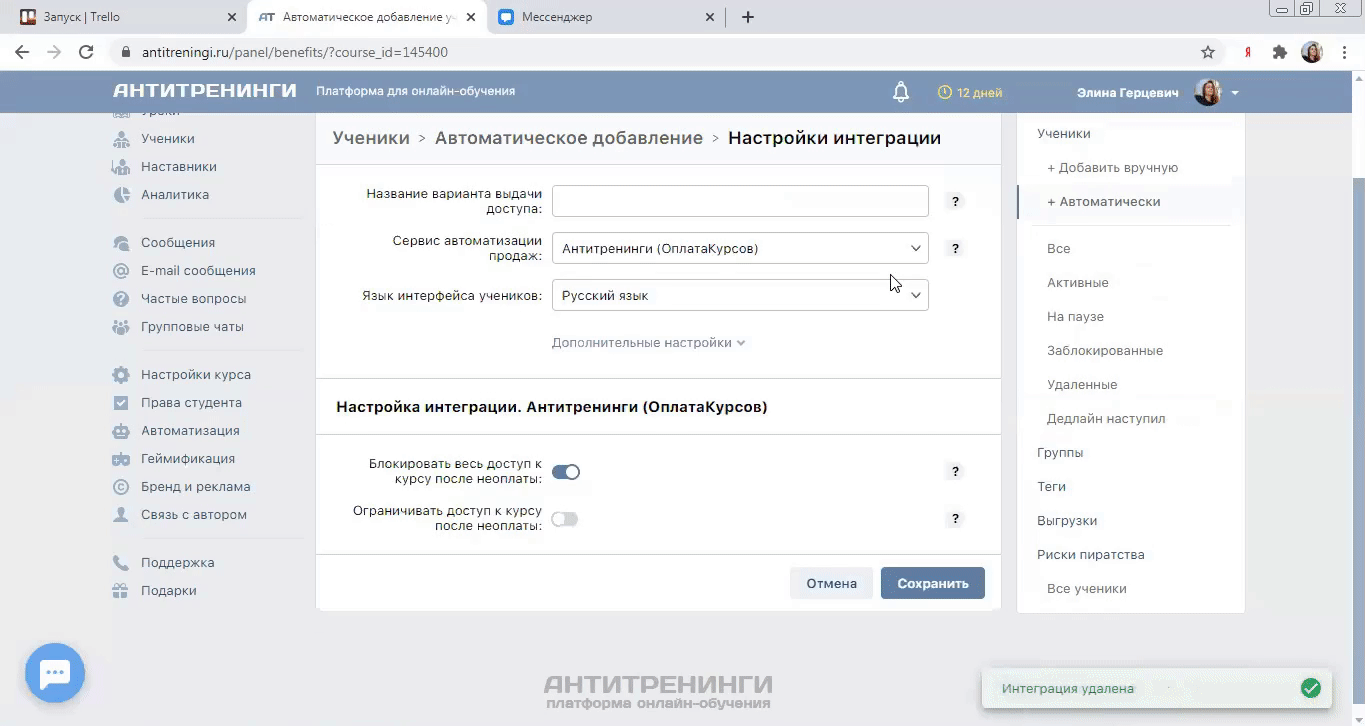
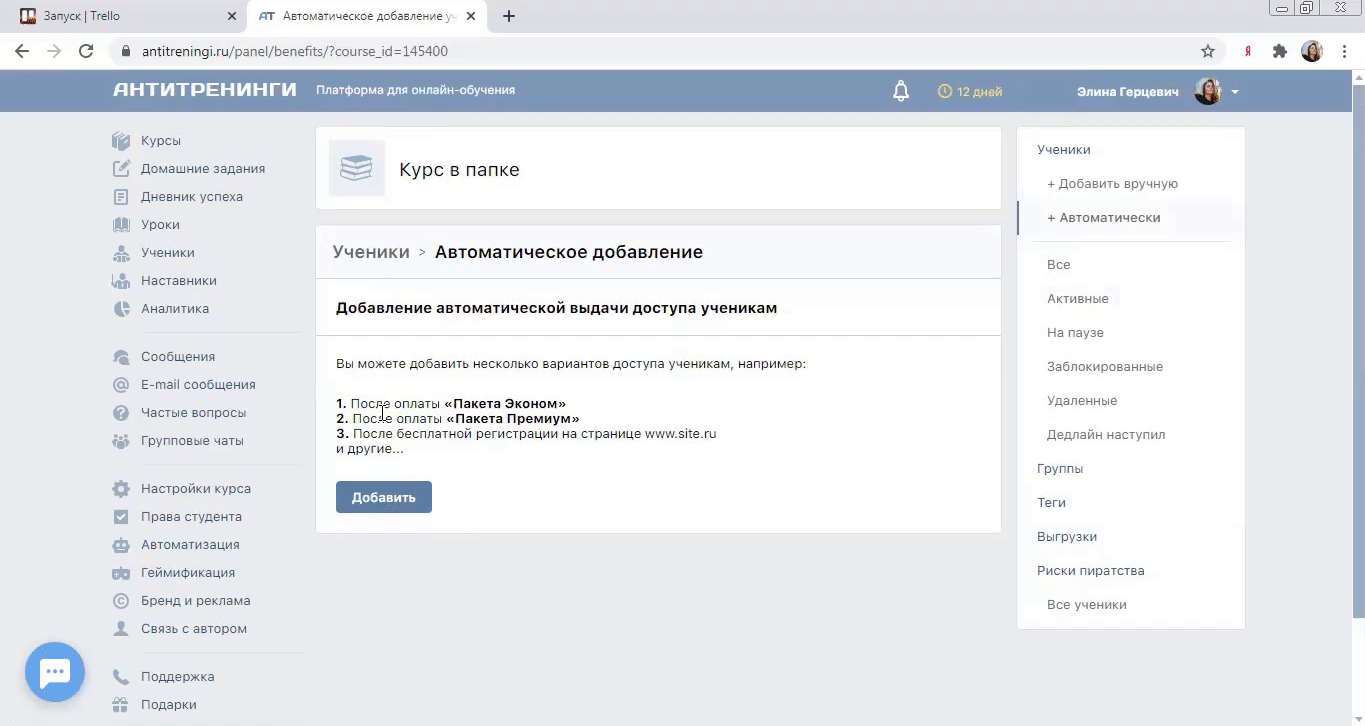
— Previously, when you click on the main button «+ Student», the interface for manually adding students was opened. Now a pop-up appears with a choice of all types of adding students. And this pop-up can be opened not only by the «+ Student» button but also through the main and auxiliary menus
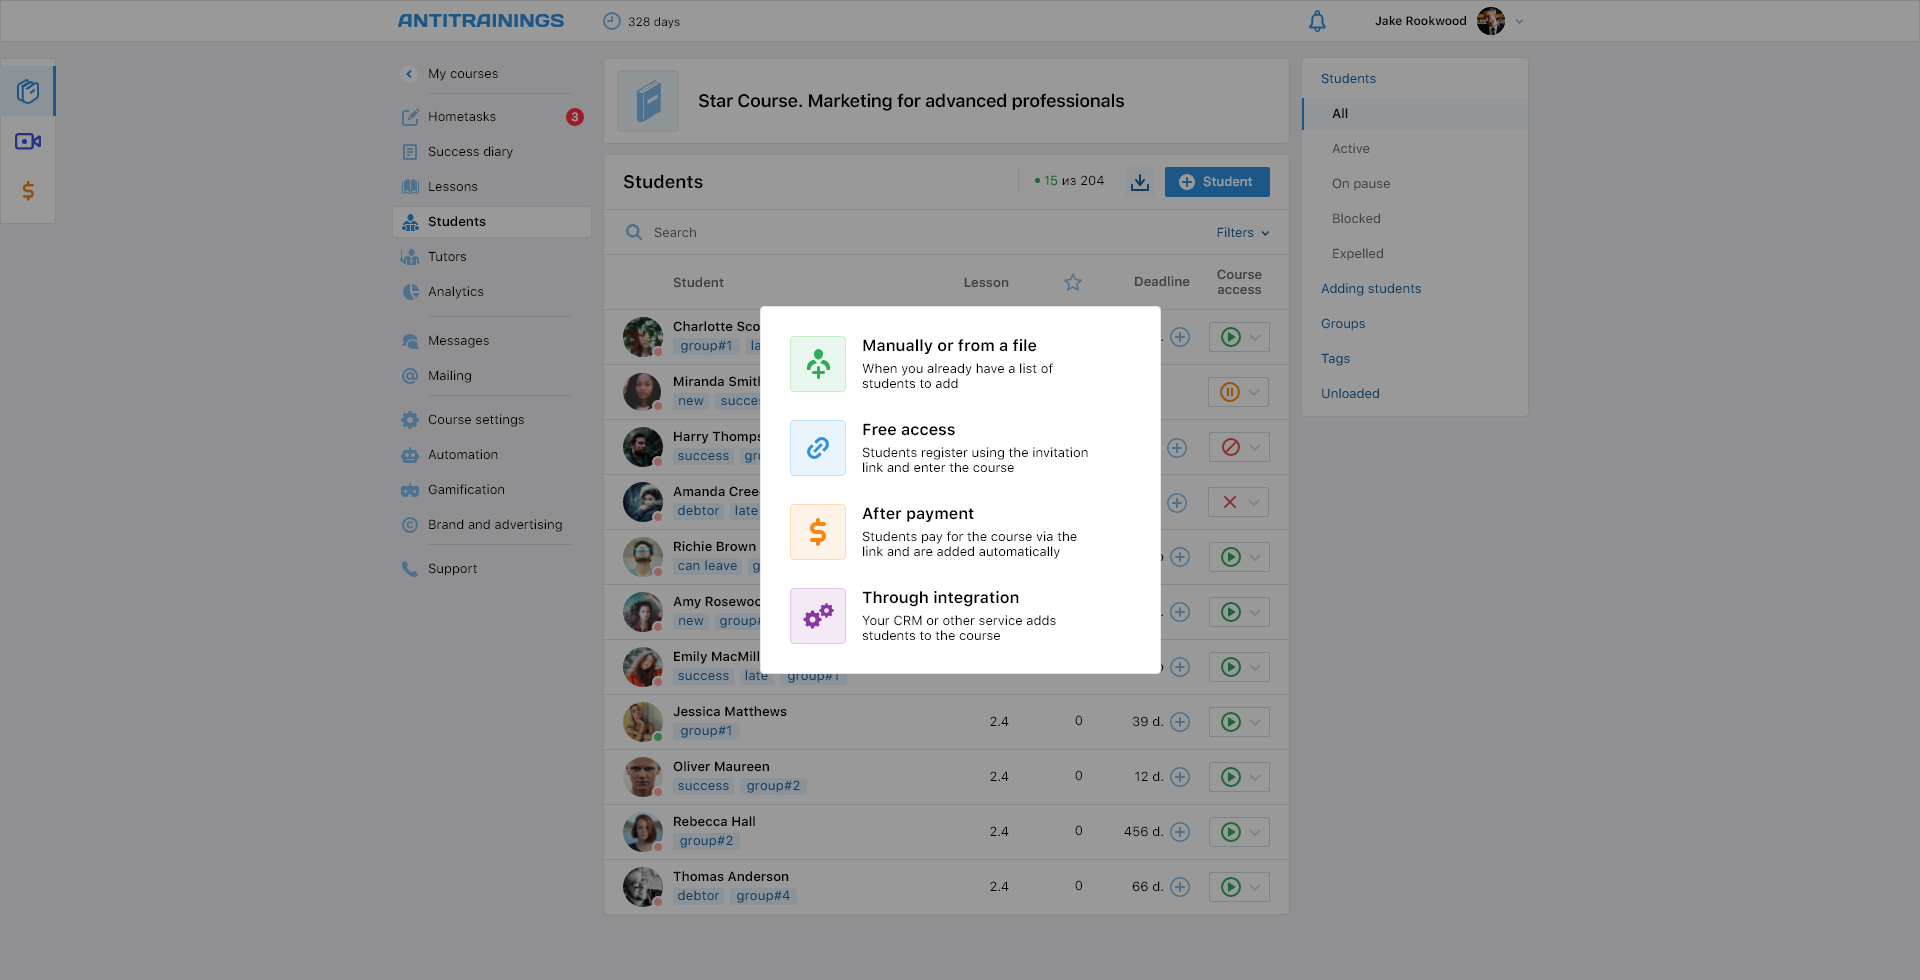
— Earlier free access, access after payment, connection integrations were combined on one screen. Users didn't understand how to set up a particular type of access. Now each add type has its own section.
— Accent was placed on copying the access link for students, because it is the main step in order for the student to get into the course.


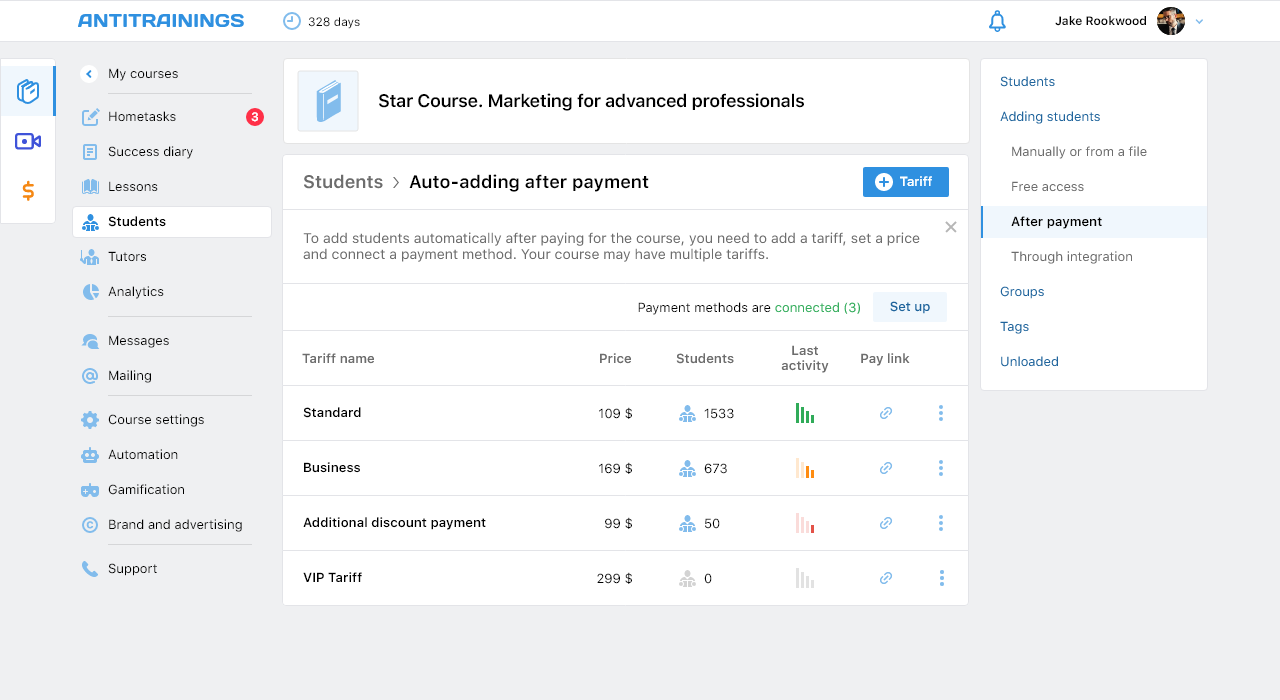

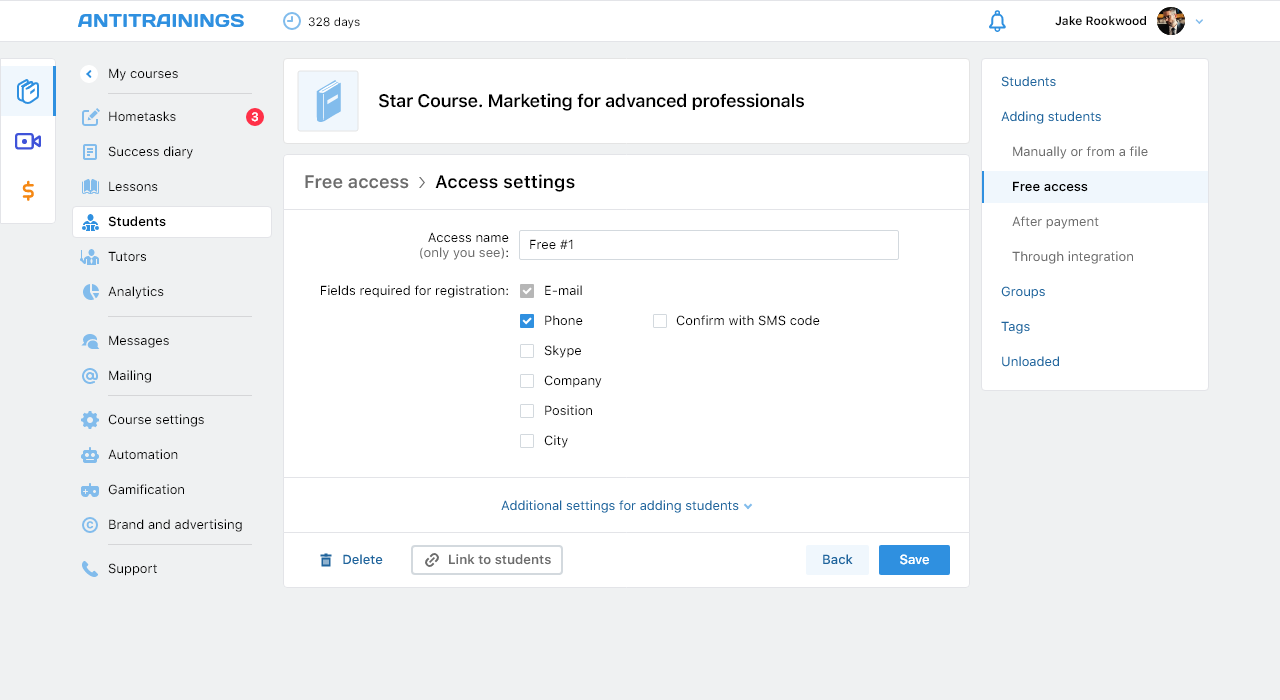
— When creating access after payment, integration with our payment service immediately takes place, the price is set and a link for payment is generated. Now you don't need to search where it can be done. At the same time, if you wish, you can shortly go to the advanced settings for connecting recurrent payments, promocodes, etc.
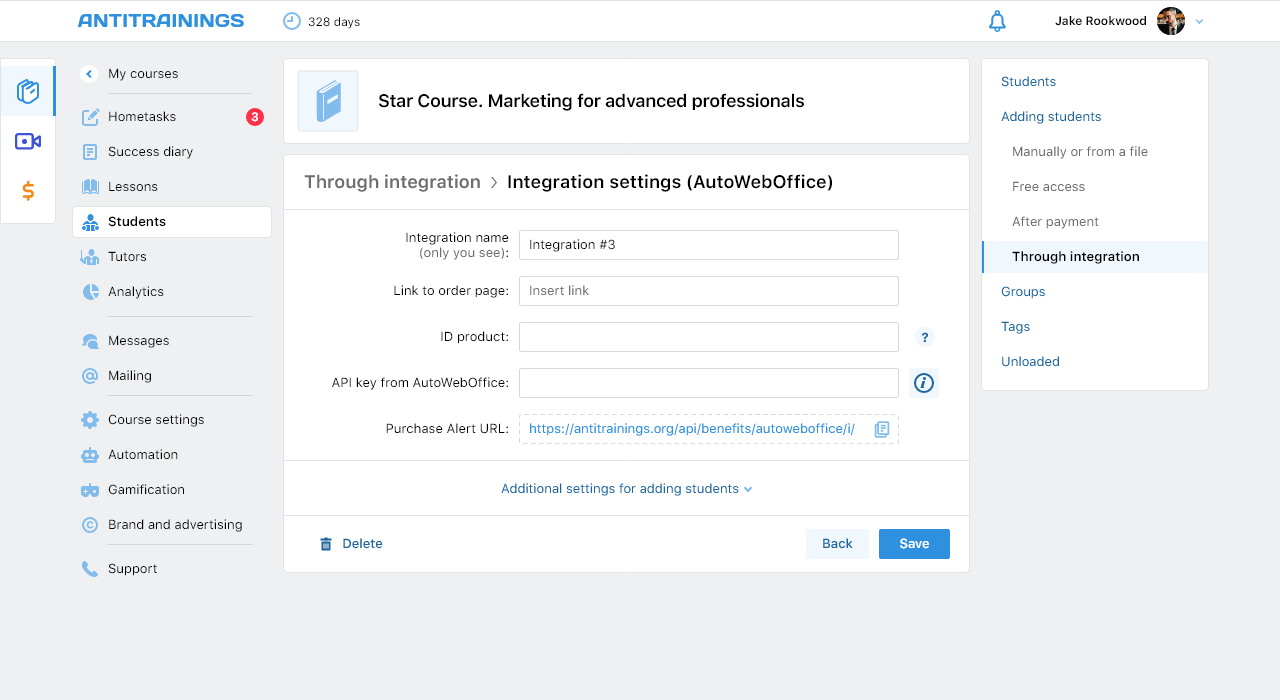
— When adding an integration, you can straightaway see the whole list of available integrations with logos for clarity.